Comparisons
AI Pose Reference Generators: Which Workflow Should You Use?
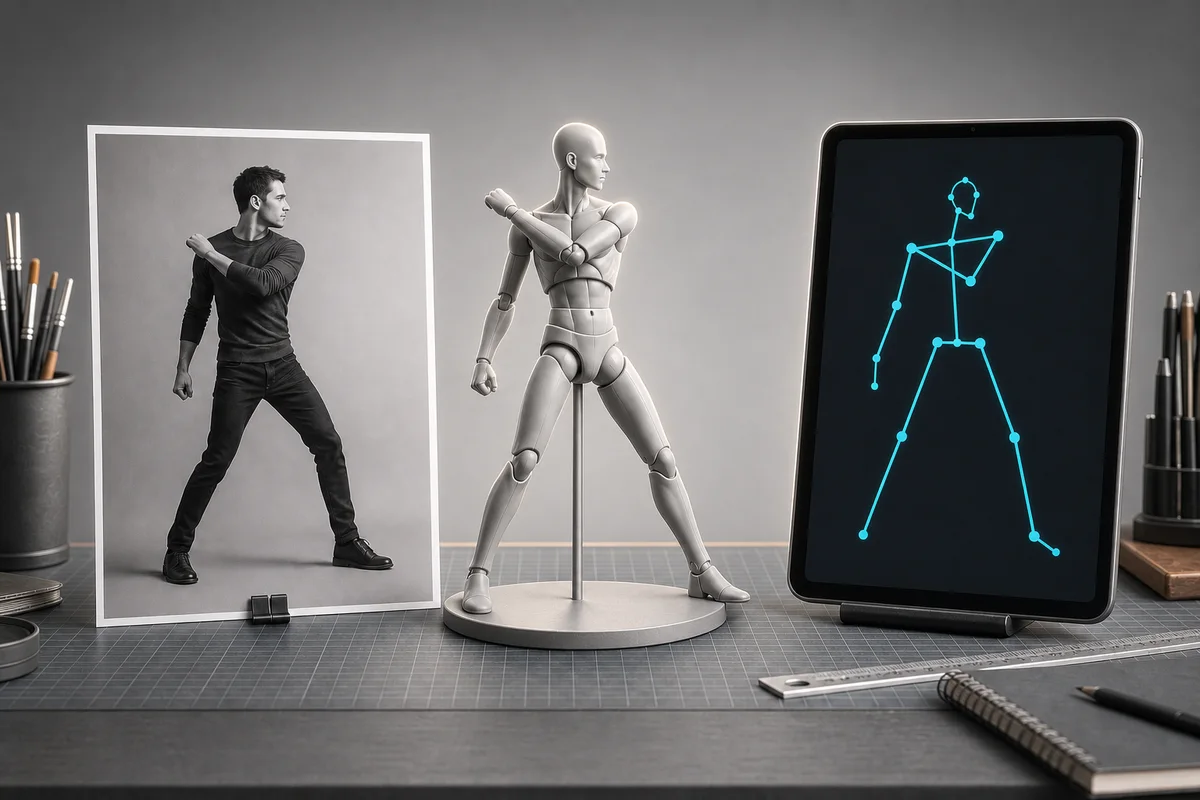
Table of Contents
- Quick Decision
- What Counts as a Pose Generator?
- Workflow Comparison
- When Nano Banana Is the Better Choice
- When a 3D Pose Tool Is the Better Choice
- When Skeleton Extraction Is the Better Choice
- A Practical Hybrid Workflow
- Step 1: Define the Deliverable
- Step 2: Choose the Control Layer
- Step 3: Add the Identity Layer
- Step 4: Generate the Finished Image
- Step 5: Review and Refine
- Selection Scorecard
- Related Guides
- Review Note
Quick Decision
There is no single best AI pose reference generator. The right choice depends on whether you need a finished image, an exact body rig, a reusable skeleton, or fast visual ideation.
| Your Job | Best Starting Workflow | Why |
|---|---|---|
| Put an existing character into a new pose | Identity image + pose image in Nano Banana | Fast path to a finished image |
| Design an exact joint position or camera angle | PoseMy.Art, Magic Poser, or DesignDoll | Direct 3D body and camera control |
| Create structural guidance for another model | Skeleton or pose-extraction workflow | Separates anatomy control from rendering |
| Explore many pose ideas from text | Text-to-pose image generator | Lowest setup cost for ideation |
| Build a consistent multi-pose character set | Identity anchor + controlled pose references | Protects identity across outputs |
The core distinction is control versus finish. Dedicated pose tools control geometry. Nano Banana and other image models turn a pose direction into a finished visual. A strong studio workflow often uses both.
What Counts as a Pose Generator?
Search results mix four different products under the same phrase:
- Text-to-pose generators create a new figure or reference from a written action.
- Photo pose changers keep an uploaded subject while altering posture.
- 3D posing tools let you rotate joints and move a virtual camera directly.
- Pose extraction tools convert a photo into a skeleton or structural guide.
These are different user intents. Before choosing a tool, decide what artifact you need at the end: a polished image, a pose reference, a controllable rig, or a skeleton map.
Workflow Comparison
| Workflow | Input | Main Control | Output | Best For | Main Tradeoff |
|---|---|---|---|---|---|
| Nano Banana image workflow | Identity image, pose image, text | Natural-language constraints and references | Finished image | Portraits, fashion, characters, ads | Less direct joint control |
| PoseMy.Art | 3D figure and camera controls | Body, hands, camera, lighting | Pose reference render | Artists and complex compositions | Requires setup before final rendering |
| Magic Poser | 3D figures and props | Joint posing, scenes, camera | Pose reference render | Illustration planning and multi-figure scenes | Final look usually needs another tool |
| DesignDoll | 3D mannequin controls | Proportions, joints, camera | Pose reference render | Precise anatomy and stylized proportions | More technical than text prompting |
| Skeleton extraction | Source photo | Detected pose structure | Skeleton or overlay | Reusing a real pose in another pipeline | Quality depends on visibility and detection |
This comparison evaluates workflow fit, not temporary pricing or plan limits. Product availability and features change; verify them on the official sites before committing a production pipeline: PoseMy.Art, Magic Poser, and DesignDoll.
When Nano Banana Is the Better Choice
Choose Nano Banana when the desired result is a usable image rather than a neutral pose asset. Google’s official introduction highlights multi-image blending, character consistency, and targeted natural-language transformations—the capabilities that make identity-plus-pose workflows practical. See the official Gemini 2.5 Flash Image announcement.
It fits these jobs:
- Transfer a fashion or portrait pose to a known subject.
- Keep a character while changing gesture, setting, or camera framing.
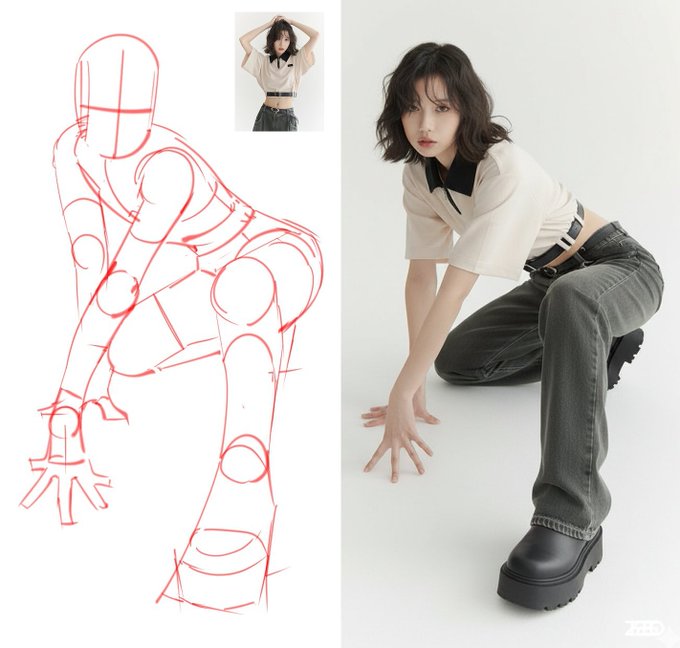
- Turn a rough sketch or mannequin render into a polished visual.
- Create several art-directed options for client review.
- Refine hands, clothing, lighting, or background after the pose is accepted.
Use this reference-role prompt:
Image 1 is the identity reference. Preserve the face, hair, body proportions,
outfit, and defining features.

Image 2 is the pose reference. Use only its gesture, limb direction, balance,
and camera relationship. Do not copy its person, face, clothes, background,
or lighting.

Create [deliverable] in [setting] with [lighting and camera]. Keep anatomy
natural and preserve the identity from Image 1.
For more variations, use the 30 Nano Banana pose prompts.
When a 3D Pose Tool Is the Better Choice
Use a dedicated poser when the body position must be designed rather than merely approximated. Direct controls are valuable for:
- Extreme foreshortening or low-angle compositions.
- Precise hand, foot, or prop contact.
- Repeatable camera placement across multiple frames.
- Two or more figures interacting.
- Anatomy studies and illustration underdrawing.
- A pose that does not exist in your photo library.
The handoff is simple: create the body and camera in the 3D tool, export a clean image, and use that image as the pose-only reference in the final image workflow.
When Skeleton Extraction Is the Better Choice
Pose extraction helps when you already have a photo with the right gesture and need a clean structural representation. It can remove distracting identity, wardrobe, and background signals before the pose enters another model.
Prefer a source image with:
- The full body inside the frame.
- Visible, non-overlapping joints.
- Strong contrast between subject and background.
- Minimal motion blur.
- A camera angle close to the intended output.
A skeleton is not an anatomy guarantee. Review joint placement, weight balance, and contact points before using it downstream.
A Practical Hybrid Workflow
Step 1: Define the Deliverable
Write one sentence: “I need a full-body fashion image of the same model in a low-angle walking pose.” This separates output requirements from tool preferences.
Step 2: Choose the Control Layer
- Existing clear pose: use the photo directly.
- Exact pose needed: build it in a 3D poser.
- Real photo contains distracting details: extract a skeleton.
- Pose is exploratory: generate text-to-pose candidates first.
Step 3: Add the Identity Layer
Use one strong identity anchor. Do not repeatedly use the previous output as the next identity source; that introduces cumulative drift.
Step 4: Generate the Finished Image
Assign each reference one role. Keep the first pass simple: identity, pose, neutral scene. Add wardrobe, dramatic light, and environment after the structure holds.
Step 5: Review and Refine
Check identity, pose silhouette, weight distribution, hands, clothing, and camera. Fix only the failed variable while preserving the accepted ones.
Selection Scorecard
Score each candidate workflow from 1 to 5:
| Criterion | Question |
|---|---|
| Pose precision | Can you directly control the joints and balance you care about? |
| Identity retention | Can the same subject survive a new camera angle and pose? |
| Speed to finished output | How many handoffs are needed before the image is usable? |
| Repeatability | Can the same setup produce a coherent series? |
| Learning cost | Can the creator operate it without a long rigging workflow? |
If pose precision dominates, start in 3D. If speed to a finished output dominates, start with Nano Banana. If both score highly, use the hybrid workflow.
Related Guides
- Nano Banana pose reference guide
- Keep characters consistent across poses
- 30 Nano Banana pose prompt templates
- Nano Banana portrait photography guide
Review Note
Workflow categories and official product pages were reviewed on August 3, 2026. Pricing, platform support, and individual features can change; this guide intentionally compares stable control models rather than short-lived plan details.
Frequently Asked Questions
What is the best AI pose reference generator?
The best workflow depends on the deliverable. Use an image model when you need a finished visual quickly, a 3D poser when exact joints and camera angles matter, and a skeleton workflow when another generation tool needs structural guidance.
Can Nano Banana generate a pose reference?
Yes. It can create or edit an image around a described or uploaded pose. It is strongest as an image-first workflow; dedicated posing tools provide more direct joint and camera control.
Are 3D pose tools better than AI pose generators?
They are better for precise, repeatable geometry. AI generators are faster for ideation and finished visual direction. Many production workflows use both: block the pose in 3D, then render or transform it with an image model.
How do I preserve a character while changing the pose?
Use separate identity and pose references, assign one role to each, state what the pose image must not change, and generate each pose from the original identity anchor rather than chaining outputs.